
Migrating your website to a cloud host can offer numerous advantages, including improved scalability, reliability, and performance. Whether you’re running a small blog, a bustling e-commerce store, or a complex web application, understanding the migration process is crucial for a successful transition. This comprehensive guide will walk you through the essential steps to seamlessly move your website to a cloud hosting platform, minimizing downtime and maximizing the benefits of the cloud.
Choosing to migrate to the cloud is a significant decision for any website owner. This article addresses key considerations such as selecting the right cloud hosting provider, evaluating different cloud hosting services, and understanding the various cloud migration strategies available. From planning and preparation to execution and post-migration optimization, we’ll cover everything you need to know to confidently migrate your website to the cloud and unlock its full potential.
Assessing Your Current Hosting Setup
Before migrating to a cloud host, it’s crucial to thoroughly assess your current hosting environment. This evaluation helps determine your needs and ensures a smooth transition. Start by identifying your current hosting type (shared, VPS, dedicated, etc.).
Next, analyze your resource usage. Track metrics like average CPU usage, RAM consumption, and bandwidth. This data informs your cloud instance selection and prevents overspending or under-provisioning resources.
Finally, inventory your website components. List all software, databases, and third-party services your website utilizes. This inventory ensures compatibility with your chosen cloud provider and helps avoid complications during the migration process.
Selecting the Right Cloud Provider
Choosing the right cloud provider is a critical step in your website migration. Several factors should influence your decision. Consider your budget, required performance, and necessary security features. Different providers offer varying levels of service in each of these areas.
Evaluate providers based on their reputation, customer support, and service level agreements (SLAs). A reliable provider with responsive support can minimize downtime and ensure a smooth transition. Look for transparent SLAs that guarantee uptime and performance.
Finally, consider the scalability offered. Will the provider be able to accommodate your future growth? Choosing a provider that allows for easy scaling can prevent future migration headaches.
Backing Up Your Website Data
Before migrating your website to a cloud host, creating a comprehensive backup is crucial. This backup safeguards your data against potential issues during the migration process. A complete backup includes all website files, databases, and any other related configurations.
There are several methods for backing up your website. You can utilize tools provided by your hosting control panel, plugins specifically designed for website backups, or manually back up your files and databases via FTP or other appropriate methods. Choose the method best suited to your technical skills and website’s size.
Verify the integrity of your backup after creation. This confirms that all necessary files are present and the backup can be successfully restored. This precaution will prevent unexpected problems during the migration.
Planning the Migration Timeline
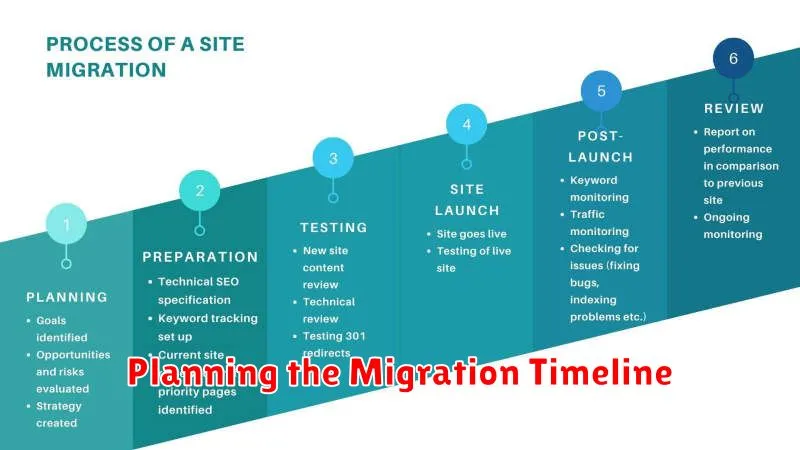
A well-defined timeline is crucial for a successful website migration. Start by identifying all necessary tasks, such as backing up your website, setting up the cloud environment, and transferring files.
Next, estimate the time required for each task. Account for potential delays and build in buffer time. This will help manage expectations and prevent rushing the process.
Consider scheduling the migration during off-peak hours to minimize disruption to your users. A weekend or late night is often ideal. Communicate the planned downtime to your users in advance.
Setting Up the New Cloud Environment
Once you’ve chosen your cloud provider, the next step is setting up your new cloud environment. This involves creating a new instance, which is essentially a virtual server in the cloud. You’ll need to select the operating system, instance size (based on your website’s resource needs), and storage capacity.
Next, configure your networking settings. This includes setting up your firewall rules to allow only necessary traffic and configuring your DNS settings. Ensure your domain name points to the correct IP address of your cloud instance.
Finally, install the necessary software on your cloud instance. This typically includes a web server (like Apache or Nginx), a database server (like MySQL or PostgreSQL), and any other software your website requires, such as PHP or Python.
Transferring Files and Databases
This stage involves moving your website’s files and databases to your new cloud hosting environment. There are several methods for accomplishing this, each with its own advantages and disadvantages. Choosing the right method depends on the size of your website and your technical comfort level.
File Transfer Protocol (FTP): FTP is a common method for transferring website files. It’s relatively straightforward to use, but can be time-consuming for large websites.
Secure Copy Protocol (SCP): SCP offers a more secure way to transfer files compared to FTP. It utilizes encryption to protect your data during the transfer.
Database Migration Tools: For transferring databases, specialized tools like phpMyAdmin or command-line utilities like mysqldump can simplify the process and ensure data integrity.
Testing Website Functionality
After migrating your website, thorough testing is crucial. This ensures everything functions as expected in the new cloud environment.
Start by verifying core functionality. Check navigation, forms, database interactions, and e-commerce processes, if applicable.
Next, test website performance. Page load speed is critical. Slow loading times negatively impact user experience.
Finally, conduct compatibility testing across different browsers and devices. Ensure your website renders and functions correctly for all users.
Updating DNS Records
This crucial step directs traffic to your new cloud host. You’ll need to modify your domain’s DNS records at your domain registrar. The most important records are the A record (or AAAA record for IPv6) and the CNAME record.
The A record points your domain name to the IP address of your cloud server. The CNAME record, typically used for the www subdomain, points to your domain’s primary A record. Your cloud provider will supply you with the necessary IP address or hostname.
The time it takes for these changes to propagate across the internet is known as DNS propagation. This can take anywhere from a few minutes to 48 hours.
Post-Migration Optimization
After migrating your website to a cloud host, optimization is crucial for maximizing performance and stability. Performance testing should be your first step. This involves monitoring your site’s speed, responsiveness, and resource usage under various loads.
Caching strategies are essential for faster loading times. Implement browser caching, CDN caching, and server-side caching as appropriate.
Security hardening is another critical aspect. Review your cloud provider’s security features and configure them correctly. Regularly update your software and monitor for vulnerabilities.
Common Pitfalls to Avoid
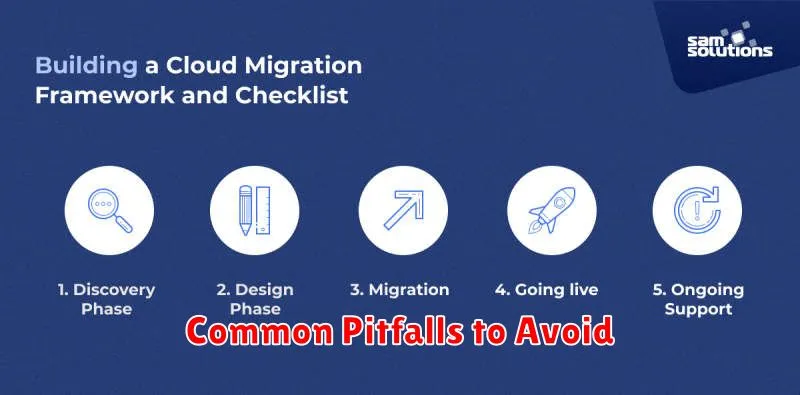
Migrating a website can be complex, and several common pitfalls can lead to downtime or data loss. Being aware of these issues beforehand can significantly improve your migration success rate.
Insufficient Planning: Failing to adequately plan the migration process, including timeline, resource allocation, and testing, is a major pitfall. A detailed migration plan is crucial.
Ignoring Compatibility Issues: Ensure your website’s code, databases, and applications are compatible with the cloud environment. Overlooking this can lead to functionality problems post-migration.
Lack of Testing: Thoroughly testing the migrated website in a staging environment before going live is critical. This helps identify and resolve any issues before impacting your users.
DNS Propagation Delays: Domain Name System (DNS) propagation can take time. Be prepared for a delay before your website is accessible at its new cloud host.